Ultimate Summer Top – The Santa Fe

So excited I had the chance to test this pattern for Adrianna from Hey June Patterns. She has created such an amazing top pattern for summer, the Santa Fe.  It’s so versatile, super easy to sew, and it’s a three season top. I would still wear them in the winter with cardigans and sweaters since it doesn’t get very cold here. Saying I love this pattern is honestly an understatement! After the Union St Tee, this is by far my favorite top. I plan on making 20 more!

Untitled drawing (2)

The Santa Fe comes with SIX different versions, and technically nine if you count the versions with and without the center seams. You have a ton of options to choose from! All views are a wide, flowy knit top perfect all those drapey knits you aren’t quite sure what to do with! Views A-C have optional center seams. Views D-F have contrasting insets. The insets are a great opportunity to use of some scrap pieces you have left over from other projects! You can color block or pattern block. You can use cotton spandex, lace, or faux stretch leather for the insets. I’m sure you could even use french terry, liverpool, and scuba for the insets too!

Views A & D are both a narrow strap tank top, but the only difference is that view A can be made with or without center seams, and view D has contrasting insets.

The black is view A in a rayon spandex I got from Joann’s. I made this one with center seams, left it unhemmed, and used a flatlock style top stitching on my coverstitch for a sporty look.  Of course I forgot to get a close up of the stitching! If you have any issues with top stitching, you can use tear away or wash away interfacing.

The navy tie dye (rayon spandex) is also from Joann’s. This is view A, unhemmed and without the center seams.

Another view A in a gorgeous periwinkle rayon floral from Sew Vaga Bond! I’m surprised I convinced myself to cut into this fabric! I was planning on hoarding it for the rest of my life… This one has no center seams, and it’s hemmed.

This beauty is view D! (Excuse the insane lighting, the sun was starting to set.) This one is definitely one of my favorites, and also my husband’s fave. Stripes are cotton rayon jersey blend and the solid is a cotton spandex. Both are from Girl Charlee. Below is a close up of the insets.

Views B & E are a wider strap tank top. View B can be made with or without center seams, and view E has contrasting insets.

Bright blue is a modal spandex from Joann’s. Modal is great because it doesn’t shrink or distort during washing and drying like rayon does, and it’s SUPER soft and drapey! I do have to say, top stitching and hemming was a pain even on my coverstitch, but I absolutely love how it came out. I made this one with center seams and unhemmed.

Also a view B without the center seams, and it’s hemmed. Fabric is a cotton rayon spandex from Girl Charlee.

Another view B in a bright rayon spandex tie dye from Joann’s. I used the blue modal above for the binding on this one, although you can hardly tell. No center seam and unhemmed.

Unfortunately I didn’t get final pictures of this one! I had to redo the binding, but never actually had the time before pictures. This is a view E, hemmed, with cotton rayon spandex bodice and faux stretch leather insets. Both fabrics are from Girl Charlee. I plan on using regular cotton spandex for the binding.

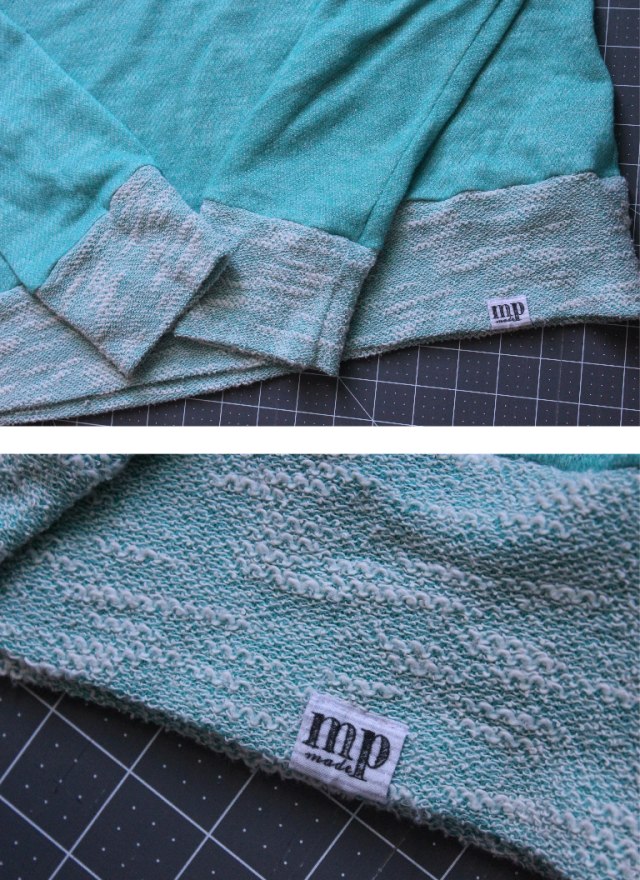
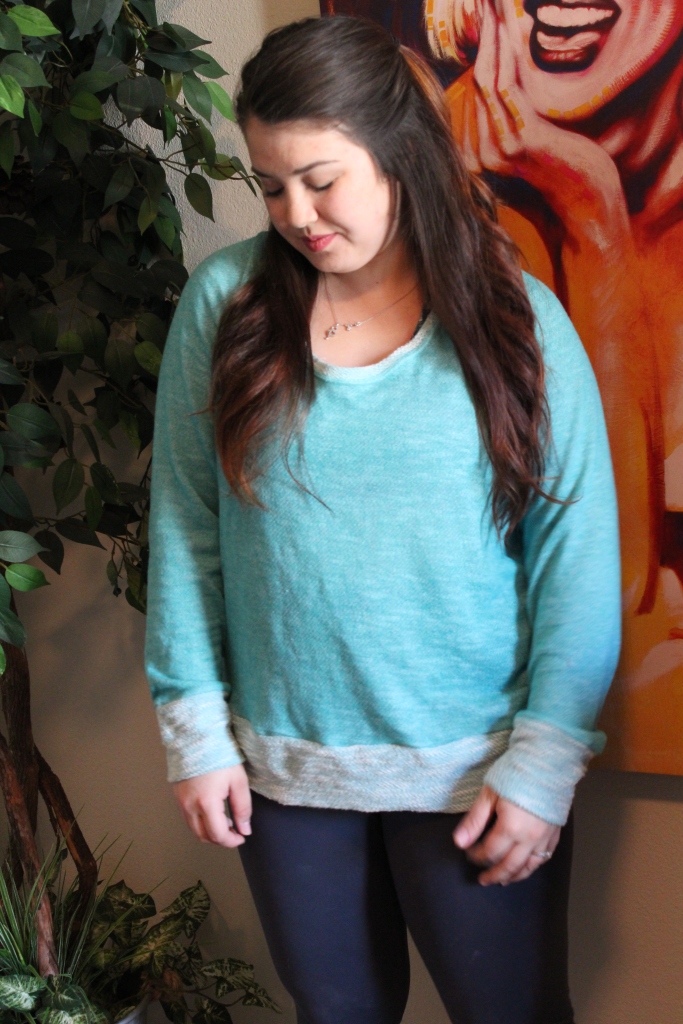
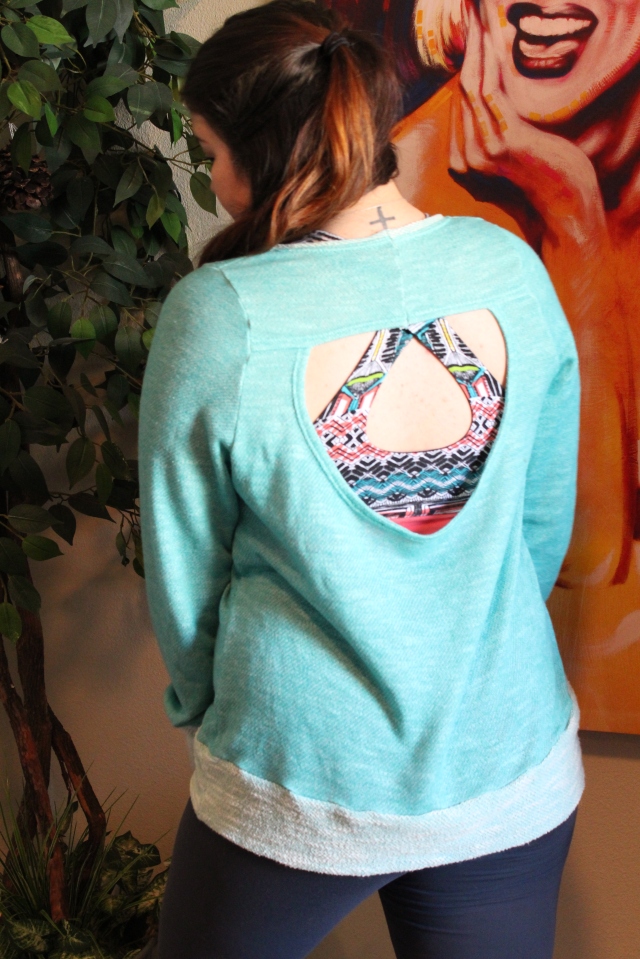
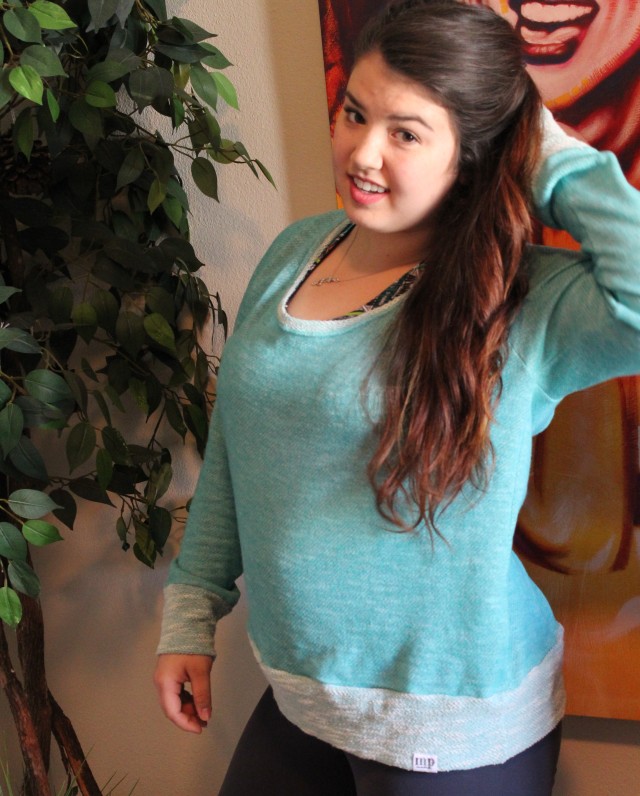
Finally, we have view C which is a dolman style top with cuffs. I made this one in a solid burgundy rayon spandex from Joann’s. This was actually my muslin, but I loved it so much! I left this one unhemmed.

Fabric makes a huge difference in the final look. Any lightweight, drapey fabric is perfect for this top! Cotton spandex, lace, faux stretch leather, and other fabrics would still work for the insets only. Others who tested the pattern in smaller sizes were able to use lightweight wovens so that’s also an option! The Santa Fe pattern shows you how to use binding for the neck and armscyles, but using bands will work also! Since this is such a drapey, lightweight top, hemming is an option! Perfect for those who hate hemming!

Go ahead and grab the Santa Fe Top while it’s 25% off until May 16th! No code needed for discount! Check out all the tops Adrianna made on her blog, and also look at all the awesome tops in the tester round up which should be online tomorrow! I can’t wait to see all the Santa Fe’s you make in the Hey June Pattern group on facebook!!! I hope everyone has a great weekend!

-This blog does contain affiliate link, but all opinions are my own!-

DIY: Custom Clothing Labels

I hope everyone has had a good week so far! I’ve gotten a little behind on my post lately, but I’m hoping to get more up soon!

Today we’re going to talk about custom fabric labels. For the longest time, I was pretty intimidated by making my own, mainly because I didn’t want to waste money if it didn’t work out.

The first time I tried making my own, I used twill tape and iron on transfer paper. I hated the way it looked. It looked cheap and poorly made. I ended up never using them. So that was a bust!

The second time I tried, I bought iron on fabric that’s already cut to the size of printer paper. I just created an image for the labels, printed, cut them, ironed them onto what I was making, and top stitched. Since the fabric is made to be printed on, you don’t have to soaked the fabric in any solution to make the ink permanent. This worked for the bibs and burp cloths I was making at the time, but not for clothing labels.

I thought about ordering labels from an Etsy shop, but I just couldn’t convince myself to commit. I wanted to be 110% in control of my labels (the design, the size, the colors, etc). That’s when I decided to try a similar method to the printed iron on fabric method above. Only this time, I used Spoonflower to print it on fabric for me.

The first set of labels I ordered were the grey/black ones below (top left).  I order a yard of basic cotton ultra, which gave me roughly 445 labels! Here’s the best part… each label cost $0.04!!! That is insanely cheap compared to ordering from Etsy or other methods I tried. I absolutely love how they turned out. The only issue I had was the tiny dotted lines to mark where I would fold disappeared on the solid light grey. That’s an easy fix for how inexpensive these are.

I later decided I wanted some colored ones for spring (the bottom picture)! I picked four pastel colors and four darker colors. I had them printed on a fat quarter of basic cotton ultra. I didn’t want to order a yard this time in case I didn’t like some of the colors. I’m happy I did that, because the dark purple, red, and burgundy, I didn’t care for how they turned out. I’m SWOONING over how gorgeous the pastels and dark teal came out!!! Those will definitely be ordered again. I ended up with 60 labels ($0.16 per label). I would have 252 labels ($0.06 per label) if I ordered a yard. These are bigger than the gray/black labels I ordered so that’s why you get less. The white border around the labels is used to mark where I fold the fabric.

If you don’t like the fold over style labels, I gave an example for horizontal labels (top right). I haven’t ordered that style yet, but I’m sure they would turn out super cute!

Untitled drawing.png

Let’s get to the tutorial!

  • Go ahead and create your image. My labels were 2 in by 3 in (that includes seam/hem allowance which is 1/2 in all the way around each label). The end size after you fold it in half is 1 in by 1 in. I definitely recommend ordering a fabric swatch pack (comes with a plain swatch of all fabrics they offer) and an 8 x 8 color guide or a full sized color map (here). Picking colors from the color guide/map is important! Colors look completely different on a computer screen than they do on fabric.

  • Save your image as an SVG (when you upload a SVG to spoonflower, it will ask you to adjust the image to the correct size. When I uploaded a JPEG or PNG, my image ended smaller than what I wanted.).

  • Decide which fabric you want it printed on and what size.

  • Submit your order and patiently wait until it arrives!

  • Once you get it, prewash, dry, and press the wrinkles out of your fabric. I used starch spray when I pressed, but that’s not necessary.

IMG_2100

Gather your supplies:

  • Labels

  • Interfacing (I used this one)

  • Clear ruler

  • Rotary cutter and rotary mat or fabric scissors

  • Iron

  • Press cloth

  • Matching thread

Untitled drawing (5)

Step 1 – Cut your interfacing to fit your labels.

Step 2 – Lay your labels right side down then lay the interfacing down (smooth side facing up). Place your press cloth down and press on the hottest setting. If you don’t have a press cloth, you can use a paper towel or plain cotton fabric.

IMG_2115

Step 3 – trim off the excess interfacing and fabric.

Untitled drawing (8)

Step 4 – cut the labels into stripes then cut the stripes.

Step  5- use the white border as a fold guide, top stitch, then knot and cut the excess thread.

Step 6 – sew your new, awesome label into everything you make!

Untitled drawing (9)

Above you can see my original labels I order from SF. My favorite out of those four is the light gray stripe. It looks super clean and polished. The solid charcoal grey ended up darker than I wanted it, but I still like it a lot!

Untitled drawing (10)

My close up glamour shots of my new colorful labels! The pastels are so gorgeous to me! Clean and polished, perfect for Spring.

Untitled drawing (7)

Above I have some labels sewn into a couple shirts at the back neck band, and also sewn into the back of a sports bra I made. Below I added one to the front of the waistband. This is why I love this style of labels! You can use them on the inside of your garment or on the outside at the waistband, leg or wrist cuff, or any where you’d like!

Untitled drawing (3)

That’s it you guys! I hope you enjoyed this tutorial. See you soon!!!

Greenstyle Open Back Pullover + Jade French Terry

Well folks, here it is! The open back pullover by Greenstyle Creations. If you haven’t gotten this pattern yet, seriously what are you waiting for? It is perfect year round!
IMG_2007
There are tons of options to pick from when creating your pullover! Low or crew neckline. High or low scoop back (with or without a mesh insert, and/or with or without a racerback insert) or closed back. Sleeveless, short sleeve, or long sleeve. You can even extend the bodice and leave off the waist band. There is seriously so much you can do with this pattern. The sports bra I have is the Stitch Upon a Time brazi bra. I will have an individual post in a couple weeks about all the sports bra patterns I have tried and compare them.
IMG_2047
FRENCH. TERRY. I absolutely love love love french terry! I bought mine from Raspberry Creek Fabrics. I should have sized down with this FT because it ended up a little bigger than I would like, but I definitely love how comfy it is!!! I just want to wear it ever single day. This one is a low neckline, high scoop back, and long sleeves.

IMG_2073 (2)

I also made a sleeveless version (also a low neckline and high scoop back) using some brush poly from Zenith & Quasar. Her brushed poly is to die for! It’s so freaking soft. I made another one just like this one using Z&Q solid black brushed poly. I couldn’t find it to take pictures in. This pattern and fabric combo is great for working out or running in too!
IMG_2099
Go out and pick up the pattern! You definitely won’t regret it! Happy sewing and Hoppy Easter!!!

Hey June Charleston Dress

First things first! This is my first official blog post! I’m sure you’re not that excited about it, but I am pretty dang stoked! I’ve been putting off my blog for over a month now.  Procrastination at it’s finest you guys, but let’s dive right into the what you’re here for… The Charleston dress!
I was lucky enough to test for the wonderful Adrianna from Hey June again!  I absolutely love every pattern she creates.  She is seriously a genius! The first time I tested for her was for the Cheyenne Tunic back in December 2015 (hopefully I can get a post up about that one too). I definitely enjoyed working with her and the lovely group of ladies who tested the Charleston also!

Untitled drawing (1)

By the way, excuse my awkward posing and photography! I ordered a remote for my camera, but found out once I got it that my camera doesn’t work with wireless remotes. Total freaking bummer! So I set up my camera to take continuous shots on self-timer, and after about 200+ (mostly blurry) pictures and a dead battery, I managed to find four pictures (yes… only four pictures) that actually turned out good.
IMG_1984
Anyway… The Charleston Dress was kind of out of my comfort zone for me. I usually wear more laid back, athletic, comfy clothes, but I totally fell in love with this dress! It’s super comfy and super easy to sew! Do not be intimidated by pleats, princess seams, and zippers. It is definitely not as hard as you think. It comes with seven sleeve options, two skirt options, and view A has pockets.
IMG_1980
My first dress I made was a muslin of a sleeveless view B (not pictured). View B has the same bodice as view A, but has a slimmer skirt with side panels all the way to the hem. Great thing about view B is you don’t have to fool around with pleats and pockets!
IMG_1908 (2)
My second dress was a sleeveless view A. I used this ponte from fabricdotcom (no longer available) and black C/L for the side panels, pockets, and neck and armsyce binding. View A has an a-line skirt with pleats and pockets. I ended up cutting it way too short when I hemmed it. That’s what happens when you try to sew late at night! Adding a simple black band is an easy fix and adds a little something extra to the overall look.

IMG_1989

The pattern is on sale through the weekend. So go grab it while it’s cheap and sew up a beautiful Easter or Spring dress! Also head over to the Hey June Facebook group to get the 20% off code for the entire site (ends 3/28). Happy sewing and Happy Easter weekend you guys!